Week 8: Embedded Programming
This week was so much more about “Learning” than “Making”. As an architect that had (almost) no experience with embedded programming, this was a huge challenge. A part of this week’s assignment was to read the Datasheet of ATtiny microcontroller. I opened the data sheet, realized that I don’t understand it, closed it, and decided to start from some beginner’s tutorials. I went with YouTube videos, and after spending more than 10 hours of watching videos on microcontrollers, embedded programming and Arduino, I finally felt confident enough to open the datasheet – it worked!
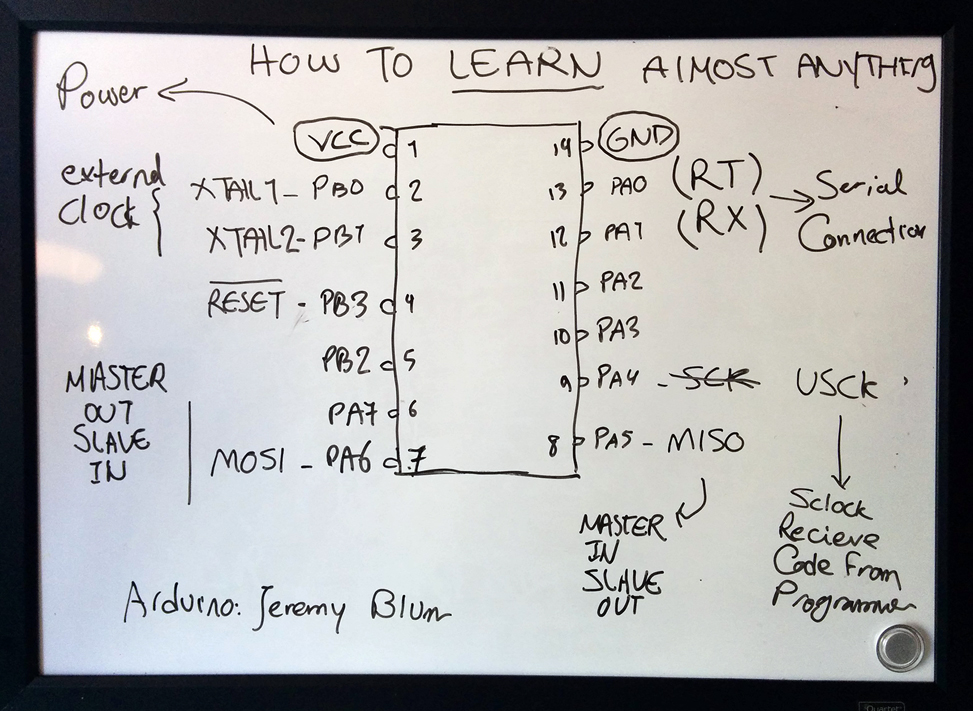
Next suggestion: Use a whiteboard, and write/draw whatever you’re learning. I made a sketch of ATTing44 on my whiteboard, and whenever I understood a pin’s functions, I added it to my sketch. At the end, I had the map of the microcontroller on my whiteboard!
Embedded Programming:
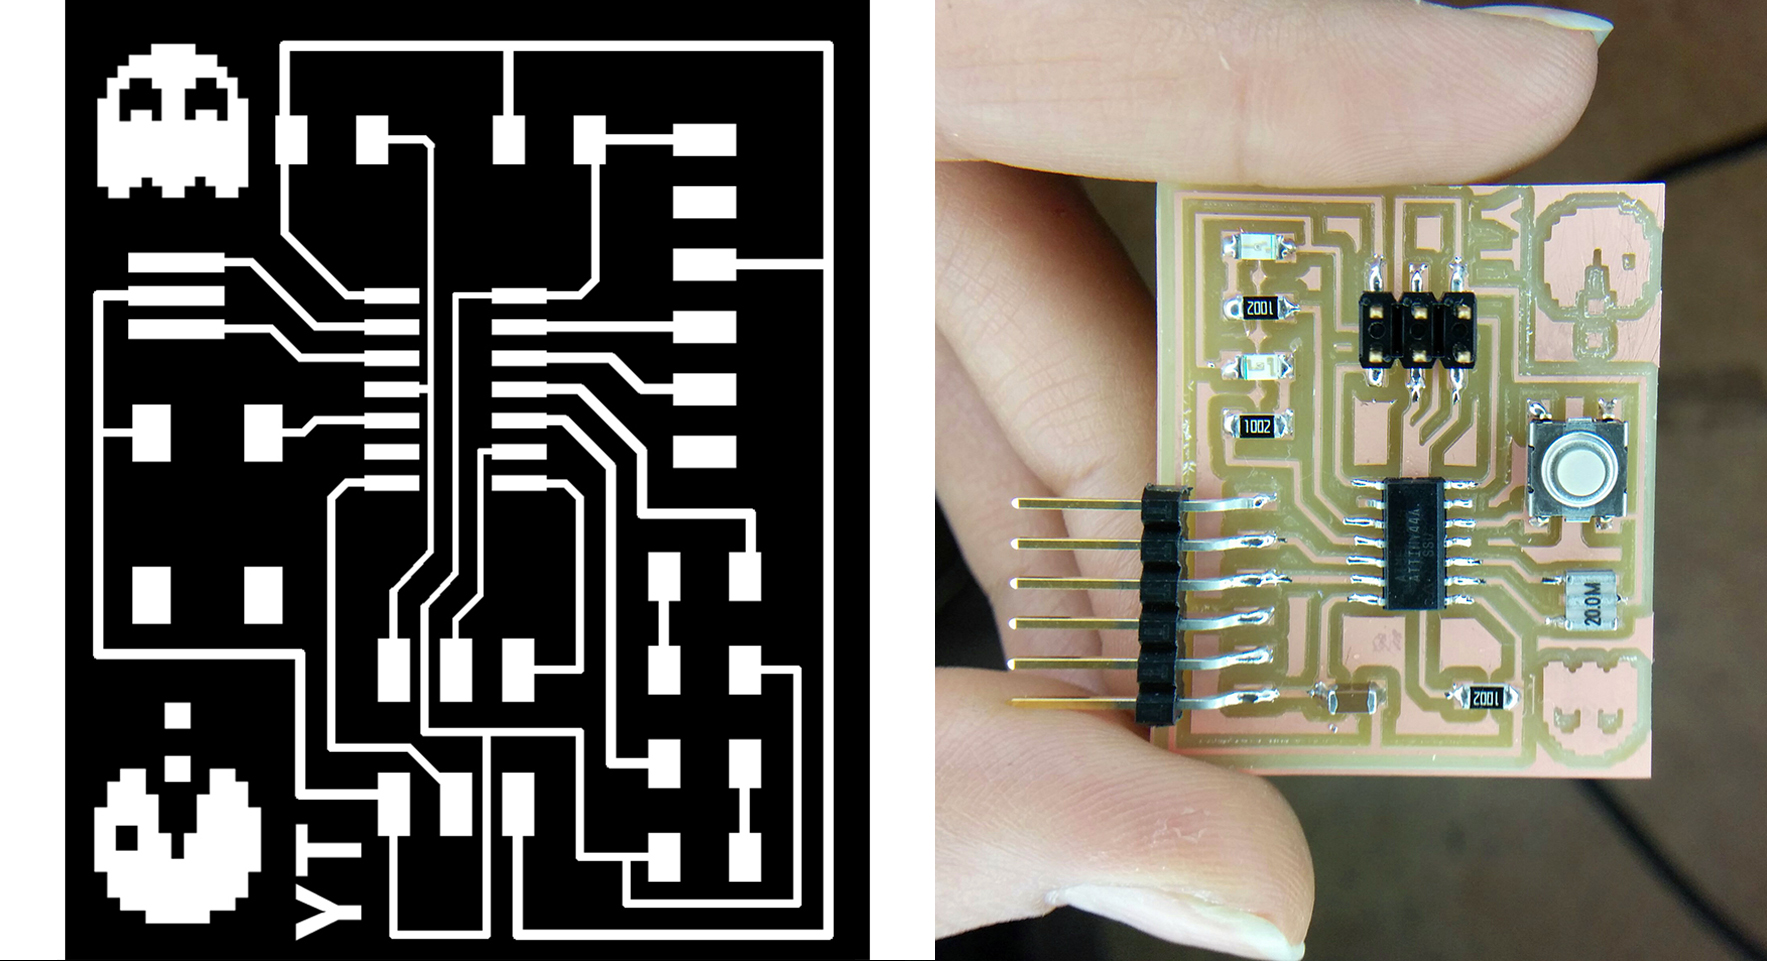
After gaining a general idea on how my tiny ATtny works, I started to actually program my board, the one that I had designed in “Electronics Design” week.
 I made the decision of using Arduino Software for programming my board – and the reason was that I knew I had to use one of Arduino’s special libraries (Brain library) for my final project, so why not start working with it from the first step. I followed this guide to set up my IDE Arduino environment for the first time: http://highlowtech.org/?p=1695
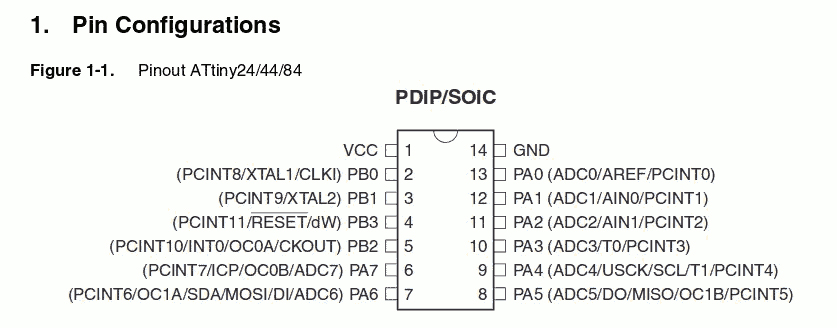
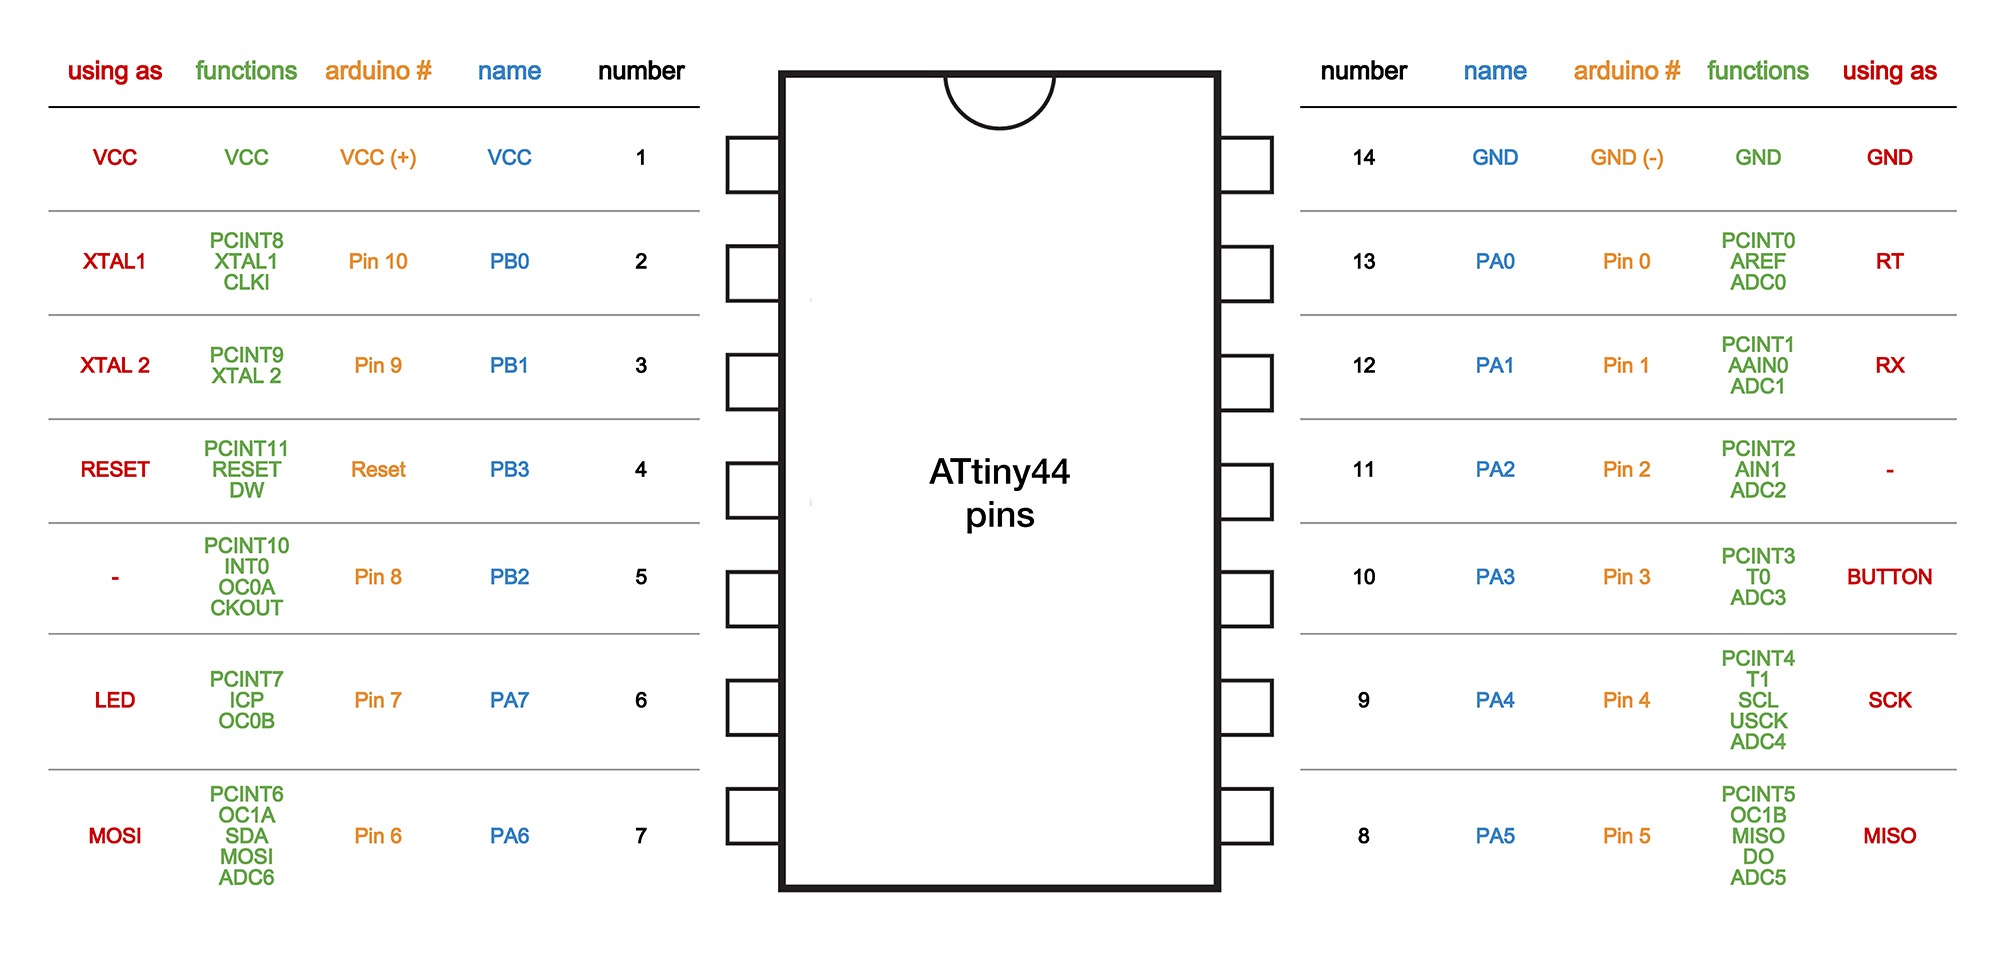
One very important point that I didn’t realize at first was that the pin number that Arduino knows for the ATtiny are different from the pin numbers in the datasheet. I used this map to enter the correct number of pins in Arduino software:
I made the decision of using Arduino Software for programming my board – and the reason was that I knew I had to use one of Arduino’s special libraries (Brain library) for my final project, so why not start working with it from the first step. I followed this guide to set up my IDE Arduino environment for the first time: http://highlowtech.org/?p=1695
One very important point that I didn’t realize at first was that the pin number that Arduino knows for the ATtiny are different from the pin numbers in the datasheet. I used this map to enter the correct number of pins in Arduino software:
Programming in Arduino
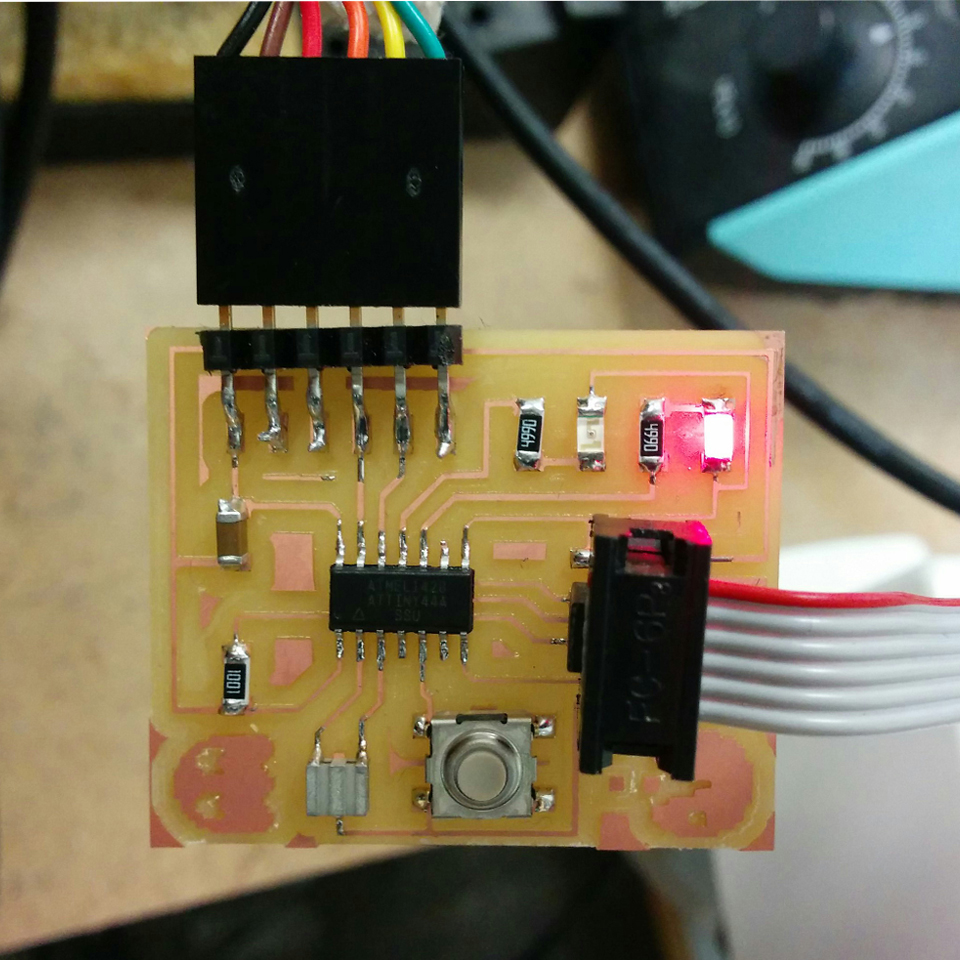
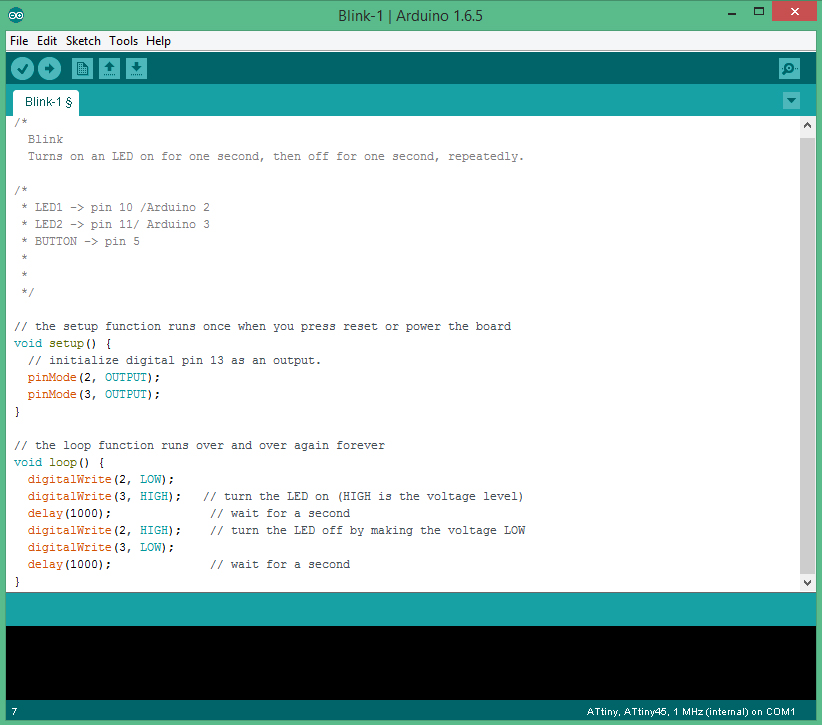
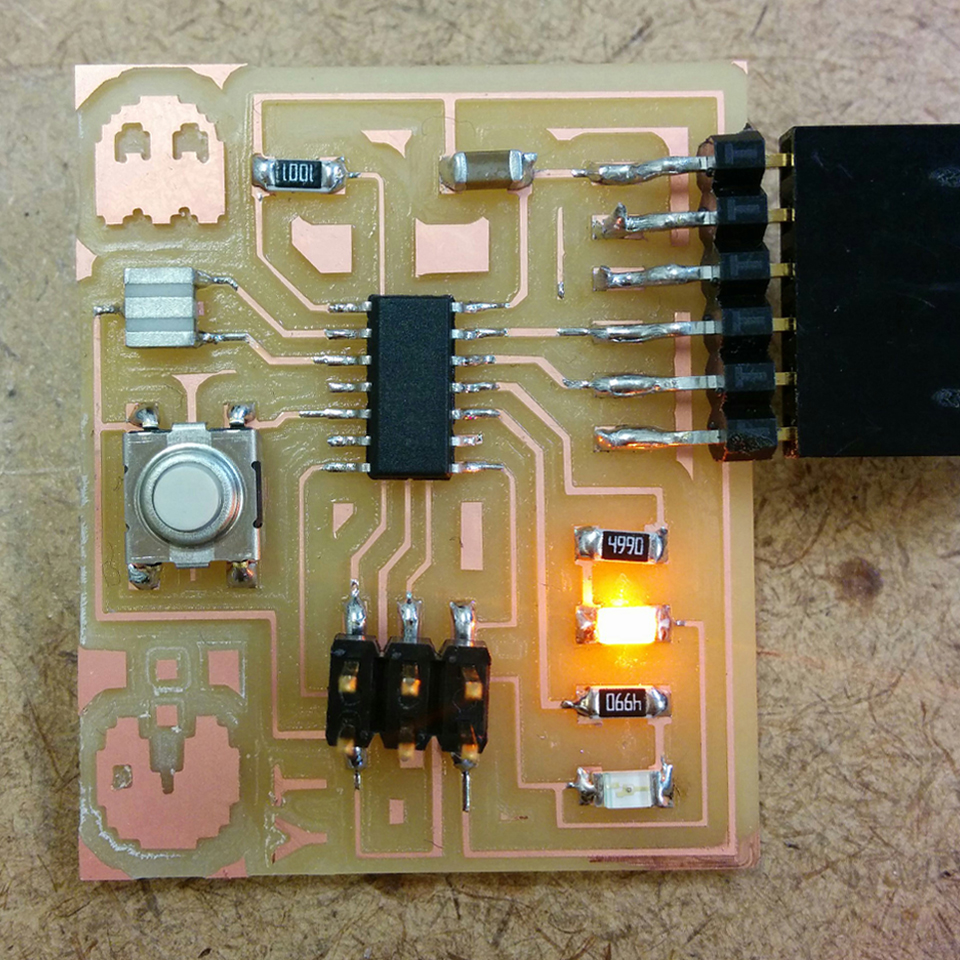
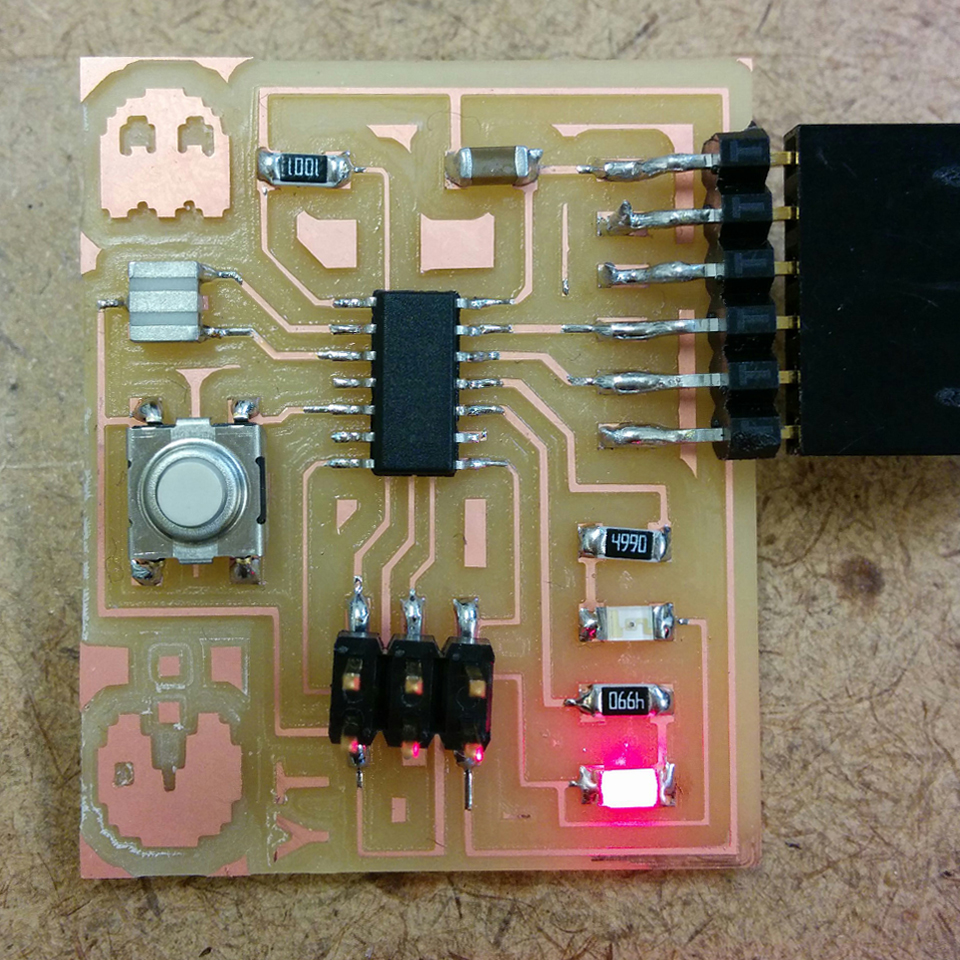
After installing ATtiny support in Arduino, I made some modification in the “Blink” example file to program my board. I had two LEDs on my board, so I modified the program in the way that my two LEDs take turn for turning on an off.
 In order to program my board, I attached it to AVRISP that we had in the shop (Just wanted to be sure that if there is any problem, it’s with my LED board and not my FABISP!) I had some struggle with windows not recognizing USB, I installed USB drivers that Morris Vanegas suggested in his page : http://fab.cba.mit.edu/classes/863.14/people/morris_vanegas/project08.html and it finally worked out.
After hitting “Upload” on Arduino interface, the magic happened. Two LEDs started to blink! Just that simple, it was the first time I made such relation between code and physical environment in my life. After all, IT’S ALL ABOUT BITS!
In order to program my board, I attached it to AVRISP that we had in the shop (Just wanted to be sure that if there is any problem, it’s with my LED board and not my FABISP!) I had some struggle with windows not recognizing USB, I installed USB drivers that Morris Vanegas suggested in his page : http://fab.cba.mit.edu/classes/863.14/people/morris_vanegas/project08.html and it finally worked out.
After hitting “Upload” on Arduino interface, the magic happened. Two LEDs started to blink! Just that simple, it was the first time I made such relation between code and physical environment in my life. After all, IT’S ALL ABOUT BITS!
After installing ATtiny support in Arduino, I made some modification in the “Blink” example file to program my board. I had two LEDs on my board, so I modified the program in the way that my two LEDs take turn for turning on an off.
In order to program my board, I attached it to AVRISP that we had in the shop (Just wanted to be sure that if there is any problem, it’s with my LED board and not my FABISP!) I had some struggle with windows not recognizing USB, I installed USB drivers that Morris Vanegas suggested in his page : http://fab.cba.mit.edu/classes/863.14/people/morris_vanegas/project08.html and it finally worked out.
After hitting “Upload” on Arduino interface, the magic happened. Two LEDs started to blink! Just that simple, it was the first time I made such relation between code and physical environment in my life. After all, IT’S ALL ABOUT BITS!